Botanical Aquascaping · Layout guide
A planted corridor through the roots — a practical layout guide
Shape a clear route between roots and planted banks, then keep that space usable as the aquarium grows.
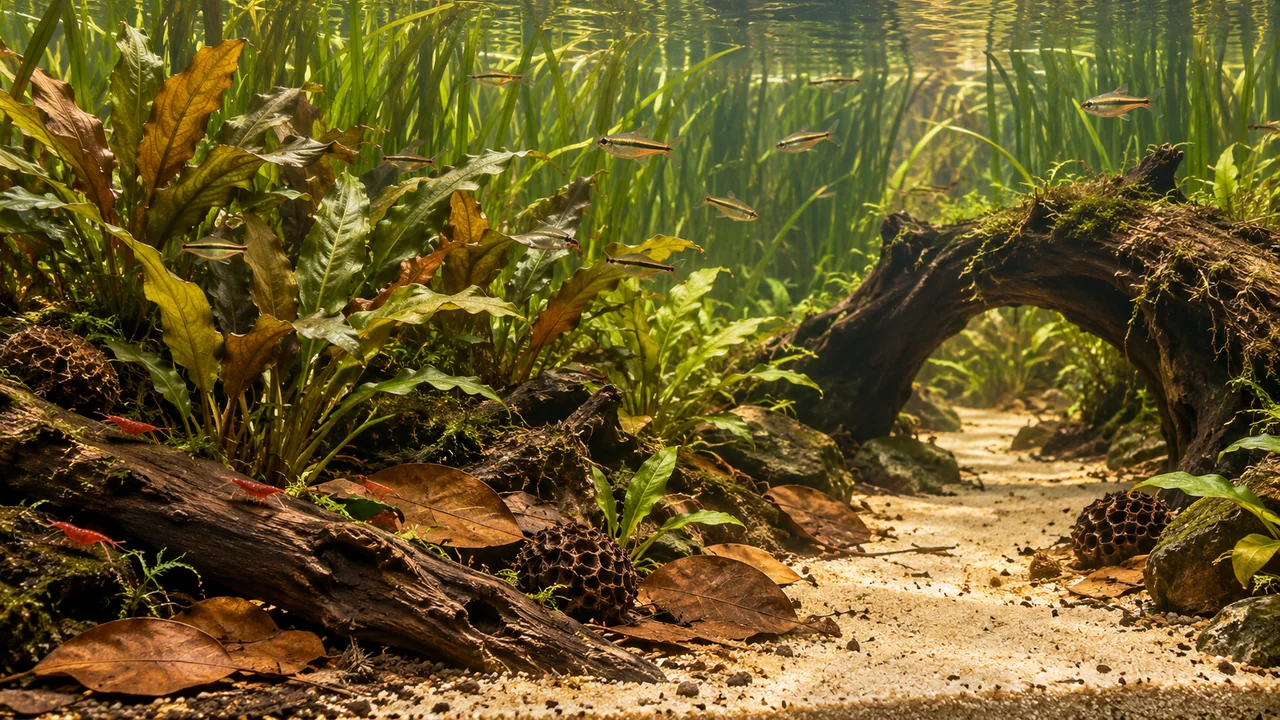
- Visual idea
- Planted banks frame a continuous, open route.
- Planting approach
- Choose groups by position, mature spread and available light.
- Maintenance priority
- Keep the corridor, root openings and plant crowns accessible.
Find the route before filling the aquarium
Start with the pale route through the middle of the composition. Its changing width draws the eye between darker root bases towards the rear. The wood supplies the arch; the planting gives the two banks different shapes. That contrast is the useful idea to carry into your own aquarium, rather than trying to fill the whole tank with equally dense vegetation.
Choose where you want the route to lead when seen from your usual viewing position. It may finish against a quiet planted background rather than a visible back corner. Use the image for arrangement, not measurements: it cannot establish the aquarium’s dimensions, equipment, water readings or the identity of every plant. Choose inhabitants and their requirements independently of the animals visible in the composition.
Set the roots around an opening, not across it
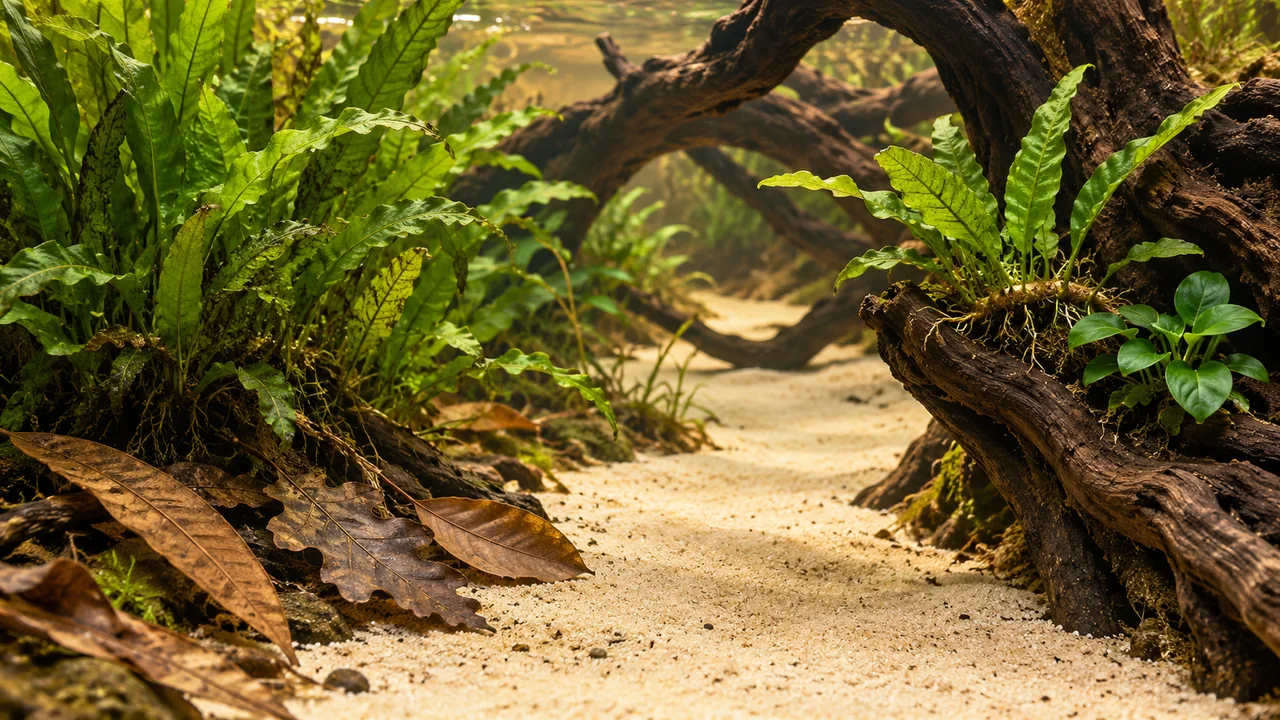
Trial the main roots before planting. Turn one piece until its line leads into the scene, then use another to frame the opposite bank without producing a matching pair. An offset opening usually gives you more interesting views than two identical arches. Look through it at aquarium height; a gap that looks generous from above can vanish behind the front branch.
Let the corridor remain continuous from the foreground to its rear destination. It can narrow visually, but it must not funnel the intended animals into an inaccessible pinch point. Keep another way around the hardscape where practical. BBA mangrove root driftwood is one material choice to explore for branching structure; select the actual piece for its shape and stability rather than assuming a product name guarantees the right opening.
Secure the structure before hiding its base
Check each support with the wood in its intended position. A branch resting on a loose leaf pile is not a stable support. Follow the aquarium manufacturer’s loading guidance and use aquarium-appropriate fixing methods where needed. Trial large pieces outside the occupied aquarium first, so moving them does not put animals at risk.
Inspect the routes between pieces as well as holes within them. Feel for sharp points, narrow forks and a wider entrance leading to a tighter space behind it. Judge the usable opening against the adult body shape and behaviour of your intended inhabitants. Keep the supports inspectable after planting; hiding an uncertain joint with a fern does not resolve it.
Give the planted banks their own substrate space
Mark out the open corridor while the substrate is still easy to adjust. Keep the growing areas beside and behind it rather than spreading the same depth of planting material across every part of the foreground. A gentle change in the edge is more useful than a perfectly straight strip that becomes difficult to maintain around the roots.
Choose substrate for the plants and animals you plan to keep, including its effect on the water and the manufacturer’s preparation instructions. A planted bank and an open sand route can use different materials where appropriate, but plan how you will keep them separated during planting and cleaning. Avoid a steep, unsupported bank that continually slides into the corridor.
Where the selected substrate-rooted plants need root-zone feeding, Aquarium ROOT TABS PRO are one product option to assess under their directions within the planted banks. Keep the open corridor separate from enriched growing areas and choose nutrition around the actual plants.
Build plant groups with room between them
Choose a few groups with different heights or leaf shapes, then leave visible wood between them. A stronger group beside the entrance can frame the route; smaller groups further back can keep its destination readable. Think about the plants’ eventual spread before adding another pot to every exposed patch.
For a wood-attached option, Java fern can be secured to a root or stone while its rhizome remains exposed rather than buried. Tropica’s Java fern guidance explains that distinction. Rooted plants need their own suitable substrate position and growing room. These are choices for building your version, not an identification of the plants in the composition.
Check the light at the planting position
Place plants according to the light that actually reaches them, including shade from the arch and neighbouring foliage. A bright-looking foreground does not establish the conditions beneath a root. Leave room above the lower groups so future growth does not close their light and water access at the same time.
Select plants whose documented requirements fit the aquarium you can maintain. If a group struggles, first reconsider its position, shading and husbandry rather than simply extending the lighting period. The layout does not require a particular CO₂ system, fertiliser regime or high-output light just because it looks lush. Those decisions belong to the selected plants and the whole aquarium.
Use leaves as an edge detail
Add the first prepared leaves beside the root bases, leaving plant crowns and the sandy route clear. A few narrow longan leaves can suggest a different line from broader mulberry leaves. Choose each material using its own product guidance; the purpose here is to vary the edge without laying a heavy blanket over the planting.
A mixed leaf-litter starter box offers another way to compare shapes, but it is a selection to work through, not an instruction to add the entire contents. Keep loose accents removable. If a leaf repeatedly drifts over the same plant or blocks the corridor, change its position or remove it instead of wedging it under the plant to hold the photograph together.
For comparing leaf forms around the banks, the Blackwater Leaf Box – Leaf Litter Starter Mix provides a mixed supply to work through gradually. Place selected prepared leaves beside the roots while leaving plant crowns and the full corridor accessible.
Arrange, prepare and fill in a workable order
First, trial the wood and reserve the corridor, equipment access and planting areas. Prepare the selected wood, leaves and other botanicals according to the material-specific preparation guide and their individual instructions. Recheck how the prepared wood sits; a piece that floats or changes its balance needs resolving before you dress its supports.
Next, establish the substrate and secure hardscape. Plant the banks while you can reach the growing points comfortably, keeping the route visible from the front. Fill gently without washing a bank into the corridor, then restore the normal filtration and other equipment. Inspect the actual underwater clearances rather than relying on the dry arrangement.
Finally, introduce a modest first selection of prepared loose botanicals and watch where they settle. Establishing the layout is separate from maturing the filter and deciding when livestock can be introduced. Follow the aquarium’s measured water quality and husbandry requirements; a finished appearance is not evidence that a new system is ready.
Keep a working route for water and tools
Run your normal cleaning tools through the spaces you intend to maintain. Can you reach the front glass beside the wood, remove a loose leaf behind the planted bank and inspect the rear of the corridor? Keep the filter intake accessible and place equipment so maintenance does not require repeatedly lifting the main root.
Under circulating water, look for repeated accumulations of loose material, especially behind the arch and in the bank’s lower corners. Adjust the arrangement or flow appropriately for the inhabitants instead of assuming stronger flow everywhere is the answer. Retain an accessible feeding area where food and the animals’ response can be observed.
Maintain the corridor as the plants grow
Trim or reposition growth before both banks meet over the route. Work on the part that is closing the view rather than cutting every plant back equally. Remove detached leaves and inspect the shaded growing points after trimming; the aim is to preserve distinct groups with useful space between them.
As botanical leaves soften and break down, review where fragments collect. Lift manageable amounts of unwanted loose material without dismantling stable roots or repeatedly uprooting the banks. Water colour alone does not show how much organic material the aquarium is processing. Use the organic-load guide alongside routine water checks and observation, rather than judging the arrangement only by its amber appearance.
Decide what the next addition would improve
View the aquarium from the front and from a slight angle. If the corridor reads clearly, the plants have room to develop and the structure can be maintained, an empty patch does not automatically need filling. Before adding a pod, stone or extra plant, decide which role it would add and which access it would remove.
Keep this layout’s main idea: the planted banks make the open route meaningful. If you would rather emphasise height and a restrained leaf floor, explore Branches above a leaf-litter floor. For a quieter scene with upright roots and a broader unplanted foreground, follow The quiet edge of a flooded forest.
Planting guidance and further reading
These sources support the planting and aquarium-establishment points. The arrangement sequence and suggested material choices are BBA layout guidance; they are not a record of the pictured aquarium.
- Tropica — Microsorum pteropus (Java fern) — Attachment to wood or stone and keeping the rhizome uncovered.
- OATA — How to set up a planted aquarium — Plant positions, space around hardscape, aquarium establishment and routine care.