Paludariums · The Rainforest Creekbank Paludarium
The Rainforest Creekbank Paludarium
Build a retained, planted bank above a serviceable creek pool, controlling moisture and keeping both the land and water accessible.
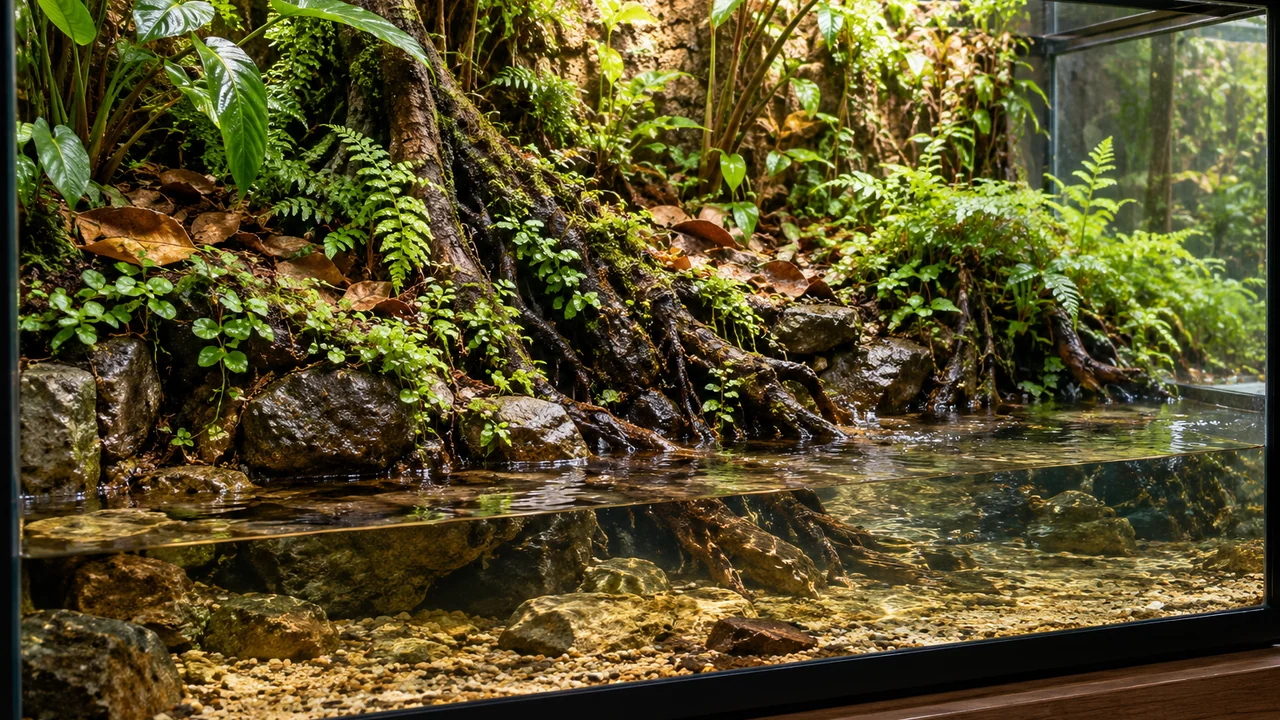
- Suggested enclosure
- 90 × 45 × 60 cm; proposed plant-display dimensions, not an animal housing minimum.
- Land and water
- A retained land tray above a separate open water basin; measure the real aquatic volume.
- Equipment
- Accessible mature filter, guarded circulation, draining land zone and controlled lighting.
- Starting purpose
- A planted paludarium; animals require an additional species-specific plan.
Make the bank the transition
The scene is a rainforest creek margin: roots descend from a raised planted shelf towards a clear pool, while broad leaves collect on the land above it. The composition needs a readable change in level and moisture. It is not a submerged aquarium with potting soil stacked at the back, and it is not a terrarium with a decorative bowl hidden beneath plants. Both zones need a route for inspection and maintenance.
Place the main bank to one side so the opposite end stays open. This gives the roots a direction and lets you see the waterline. The inspiration is a wet forest margin rather than a reconstruction of a named locality. Start as a planted display. A photograph cannot establish water volume, escape safety or suitability for an amphibian, reptile, fish or shrimp.
1. Draw the waterline and service spaces first
A 90 × 45 × 60 cm shell offers room for a low pool in front and a raised rear bank. Mark the intended waterline and measure the actual pool footprint after allowing for supports. Length × width × water depth in centimetres, divided by 1,000, gives litres before displacement; stones, wood and equipment reduce that figure. A large enclosure can therefore contain a surprisingly small aquarium.
Reserve access to a filter chamber at one end, a route to remove the heater if needed and enough space to siphon the pool. Plan how the land drainage will be emptied or returned without soaking the planting layer. Check the enclosure's permitted water depth and weight, not merely its overall size. Front doors, ventilation openings and cable entries must remain above their safe operating levels.
2. Retain the bank with a stable structure
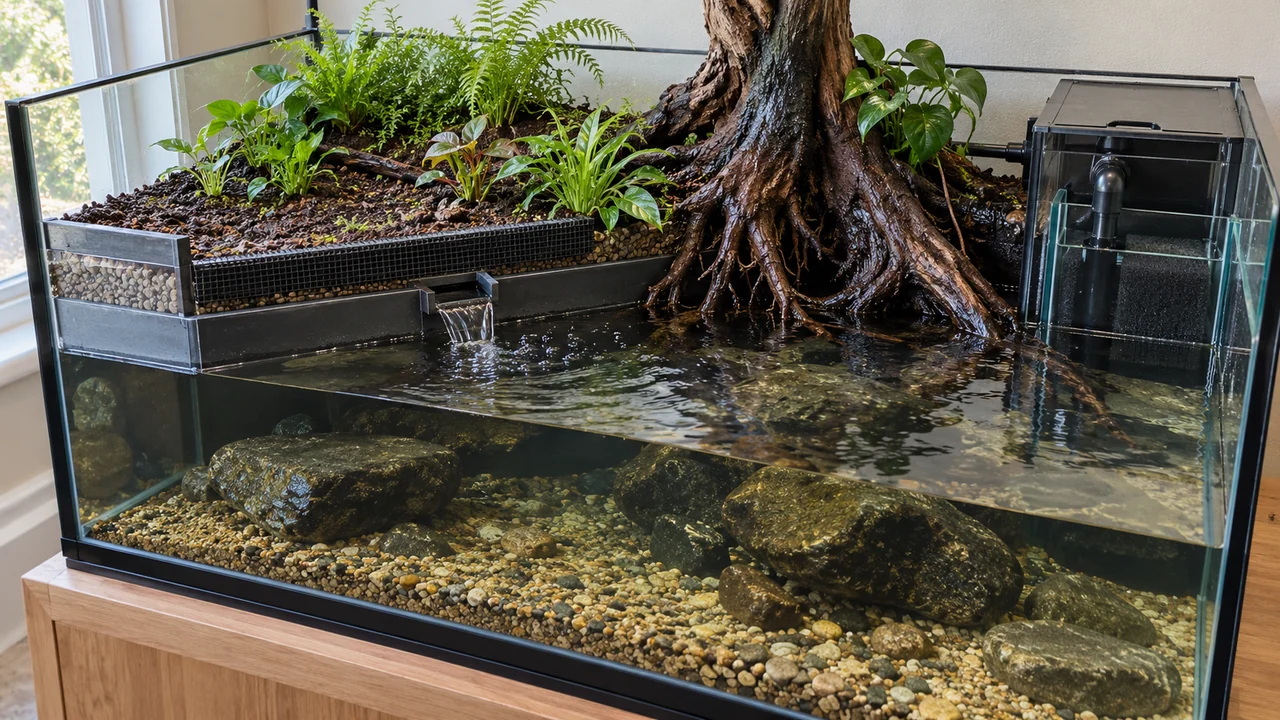
Use an appropriately supported rigid land tray or a purpose-built retained bank with materials suitable for long-term wet use. Follow the enclosure and adhesive manufacturers' load, cure and immersion requirements. Keep heavy stone contacts secure before adding substrate. A broad aquarium-safe root base can soften the retaining edge, but loose wood, moss and leaves must not be the only things holding the bank up.
Provide a drainage space under the planting substrate, a suitable separator to stop fine mix entering it and an accessible drain or siphon point. Keep the water reservoir below the rooting layer. Porous material can wick water upwards, so a raised edge alone does not guarantee a dry crown. Test the filled bank and waterline before hiding them with planting; repair leaks or sagging supports while everything is reachable.
3. Install the aquatic system before filling the land
Choose filtration for the real pool volume and intended future load, not the label on the enclosure. Biological media need a mature working cycle if animals will be considered later. Guard intakes appropriately and keep the pump removable through its service opening. Direct gentle circulation along the pool and around the bank toe, with a visible open route back towards the intake.
Add rinsed aquatic substrate only where it can be cleaned. Fill slowly and watch for planting mix washing off the bank or water bypassing the retaining edge. Run the system at its intended level and simulate a routine partial drain. Check that equipment remains safely submerged and restarts correctly according to its instructions. A water feature pump is not automatically a complete aquarium filter.
4. Root the land plants above the continuous wet edge
Use a free-draining, suitable terrestrial planting mix inside the retained land area. Small cultivated tropical ferns can occupy the shaded bank, while compact Peperomia provides a different leaf texture higher up. Select named plants whose light, moisture and adult dimensions fit the shelf. Keep crowns out of the permanent waterline unless the chosen plant is genuinely adapted to that position.
Separate a constantly wet toe from the main rooting zone. A little moisture-loving growth can soften the join, but do not bury terrestrial leaves under water or assume that all aquarium plants can grow in dry room air. Leave open substrate around new plants so their condition is visible. Avoid densely planting the filter hatch or creating a root mass that must be torn apart to reach a pipe joint.
5. Position wood and leaves by role
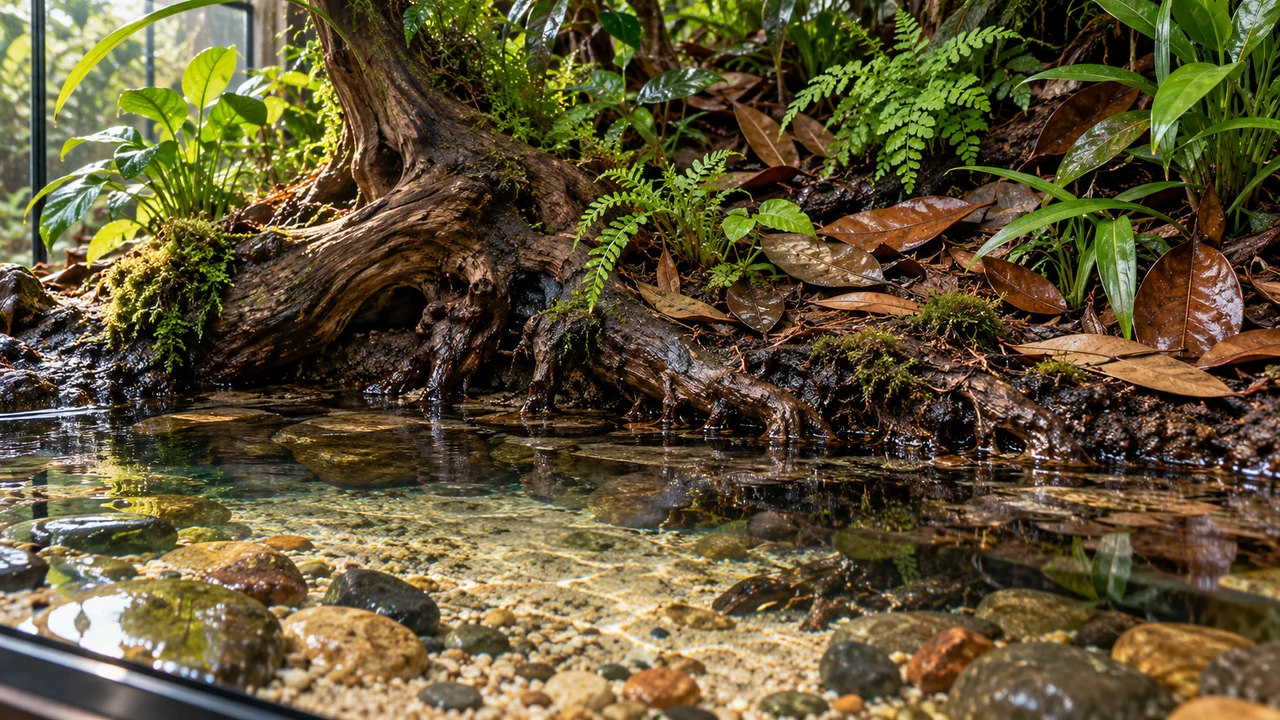
Use the principal root to lead from land into water, with thin tips stopping short of the open maintenance lane. Choose only materials suitable for the zone where they will sit. The botanical preparation guide is relevant to material entering the pool; heating a botanical does not by itself establish that a terrestrial material or treatment is safe for every animal or long-term immersion.
On the land, broad dry leaves can protect part of the substrate and give a forest-floor edge. Keep them away from plant crowns, vent strips and pump openings. Add underwater leaves sparingly, if at all, where they can be retrieved. BBA leaves, bark and woody pods are individual materials to assess, not a universal bank-building kit, waterproof lining or replacement for a filter.
For a broad-leaved upper bank, compare Dried Jackfruit Leaves (Artocarpus heterophyllus) – Blackwater Leaf Litter with Ceylon Cocoa (Cacao) Leaves – Natural Aquarium Leaf Litter, or choose individual leaves from the Leaf Botanical Enrichment Box. Keep the loose layer above the retained soil edge, with plant crowns and the route to the pool visible. Prepare any separately selected submerged pieces for aquatic use.
For texture around an accessible planted bank, Organic Coconut Husk Silk – Natural Coco Coir Fibres, 100 g offers long fibres rather than fine planting compost; secure a small amount clear of the pump and any animal access. The Blackwater Botanical Box – Pods, Bark & Seeds provides alternative woody accents to inspect individually. Neither material is a retaining wall, and the box is not a complete paludarium substrate recipe.
6. Balance light, air and moisture
For a warm tropical plant selection, roughly 20–24°C can be a practical initial room-scale design target, subject to the named plants' requirements. Measure the land canopy and water separately. Lamps and enclosed air can warm the upper bank while the pool stays cooler. Fit suitable lighting above splash range and begin with a moderate timed period, adjusting to actual growth rather than trying to illuminate every shaded pocket equally.
Keep a functioning ventilation path. Water the root zone deliberately and use light misting only where the plants need it. Persistent condensation on every pane is not a reliable humidity target, and humid air does not prove that roots are receiving water. Check substrate moisture by inspection and probe placement, and keep some surfaces able to lose surface moisture between applications.
7. Establish the planted system before considering stock
Observe drainage, plant growth and the aquatic cycle before adding animals. Record the actual usable water volume, depth, temperature, chemistry and circulation, then compare those with a full species guide. The existing Neocaridina and Amano profiles can help assess different shrimp requirements; they are not permission to put shrimp into an ornamental puddle. Fish require suitable swimming and social space beyond a volume calculation.
Do not add a frog simply because there is both land and water. Deep pools, steep banks, escape gaps and incompatible temperatures can make a visually convincing paludarium unsuitable. If the species assessment does not pass, the planted display is a complete result. There is no need to turn every water feature into an animal enclosure to make it useful or attractive.
8. Maintain both sides of the waterline
During routine work, siphon accessible aquatic waste, clean mechanical media appropriately and inspect the return path. Drain collected land water before it rises into the planting mix. Lift loose leaf accumulations in small areas and trim roots away from equipment. Check the retaining edge after moving wood; a bank can look unchanged from the front while a hidden leak slowly saturates its substrate.
Above water, remove failing leaves, keep vents clear and prune plants before they conceal the service hatch. Top-up water compensates for evaporation but does not replace water changes where they are needed. Keep a simple record of level, temperature and drainage behaviour. Repeated unexplained water loss calls for a leak and splash check, not just a larger daily top-up.
When the bank becomes too wet or difficult to service
If the upper soil stays saturated, check for wicking, a high reservoir, blocked drainage and return water escaping its channel. Correct the path before adding more substrate. If soil enters the pool, improve the retaining edge and separator rather than using a stronger filter to hide the problem. If plant crowns rot, raise or replace the affected plants and review their moisture needs.
If maintenance requires lifting the main bank, enlarge the service opening or simplify the hardscape. The successful creekbank has a stable upper planting zone, a deliberately wet toe and a clear pool you can clean. Keep those three functions readable as the plants grow. More roots, leaves or mist should only be added when they serve a specific role.
Further reading and sources
These references support the horticultural and material principles. Enclosure dimensions and the construction sequence are BBA design proposals. The planting examples do not establish suitability for a reptile, amphibian or other animal.
- Vivarium Construction 101 — NEHERP — First-hand construction principles: separation, drainage and service access.
- How to grow peperomia — RHS — Plant selection and cultivation; not an animal compatibility assessment.