Botanical Aquascaping · The Emergent Rootline
The Emergent Rootline
Join an underwater wooden margin to practical above-water planting, with supported baskets, manageable roots and an independent filtration system.
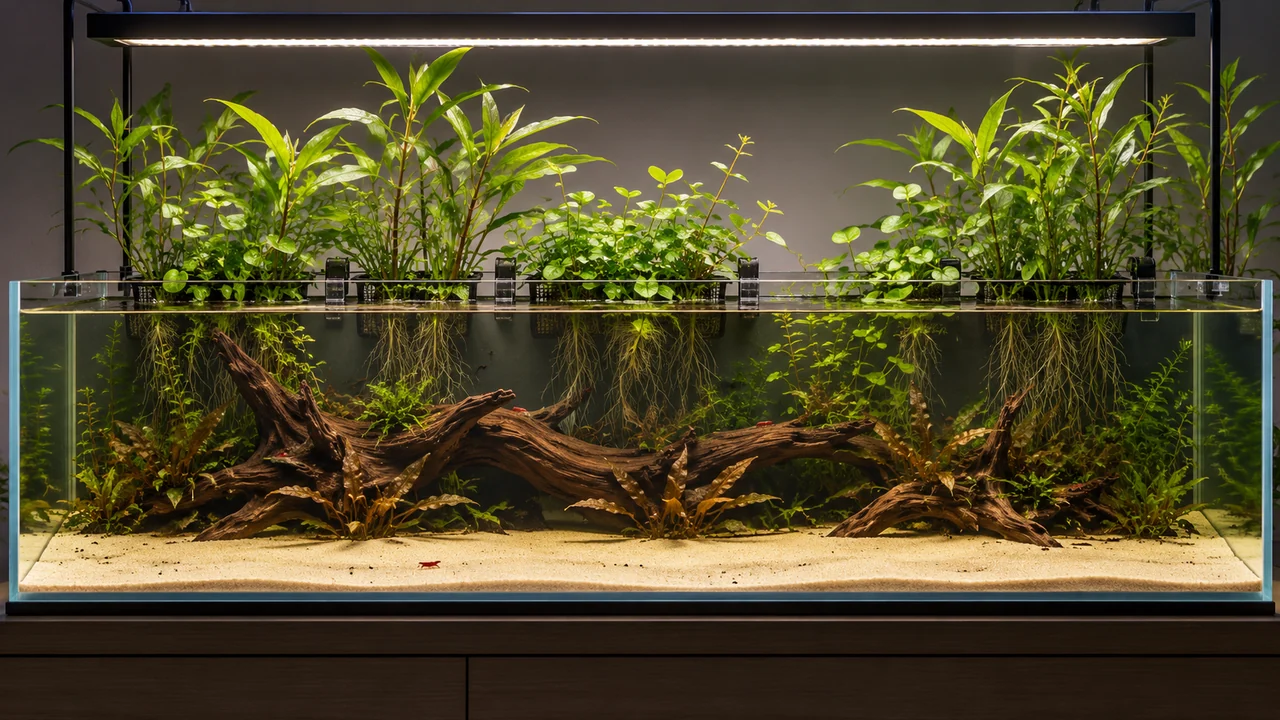
- Suggested shell
- 100 × 45 × 40 cm, approximately 30 cm water depth plus a planned planting zone.
- Main structure
- A low rear wooden line and securely supported marginal planting.
- Plant choice
- Suitable cultivated amphibious aquarium plants; foliage, crown and root positions follow the selected species.
- Equipment
- Independent mature filter, protected intake, safe raised lighting and accessible supports.
Design across the waterline without making a second tank
The visual line runs along the rear: low submerged wood continues into roots and then leafy growth above the water. The foreground remains open, so the transition can be seen through the glass. Unlike a deep root forest or a planted corridor, this project puts much of its green volume above the aquarium. Its success depends as much on support, evaporation and room humidity as on underwater composition.
This is an adaptable habitat-style planted margin, not a claim that the chosen cultivated plants and aquarium animals come from one location. It does not require a land enclosure or a mixture of amphibians, reptiles and fish. Keep the inhabitants aquatic and assess their needs separately. The purpose is a manageable waterline with useful structure, not a promise that exposed roots automatically make the aquarium self-filtering.
1. Set the working water level and maintenance space
A 100 × 45 × 40 cm shell with approximately 30 cm of water gives room for an emerging margin without filling the glass to the rim. Mark the intended level and the lowest safe operating level for the heater and filter. Check how much evaporation you can manage between routine visits. The actual water volume will be lower than the nominal tank capacity once hardscape and the reduced fill are considered.
Plan reach from above and from the front. The lamp must clear the eventual foliage without violating the manufacturer's splash and electrical installation requirements. Keep equipment and sockets protected appropriately and use drip loops. If the tank or furniture cannot support additional planting fixtures, select a different mounting system rather than resting heavy wet planters on a narrow glass edge.
2. Secure the baskets independently of the wood
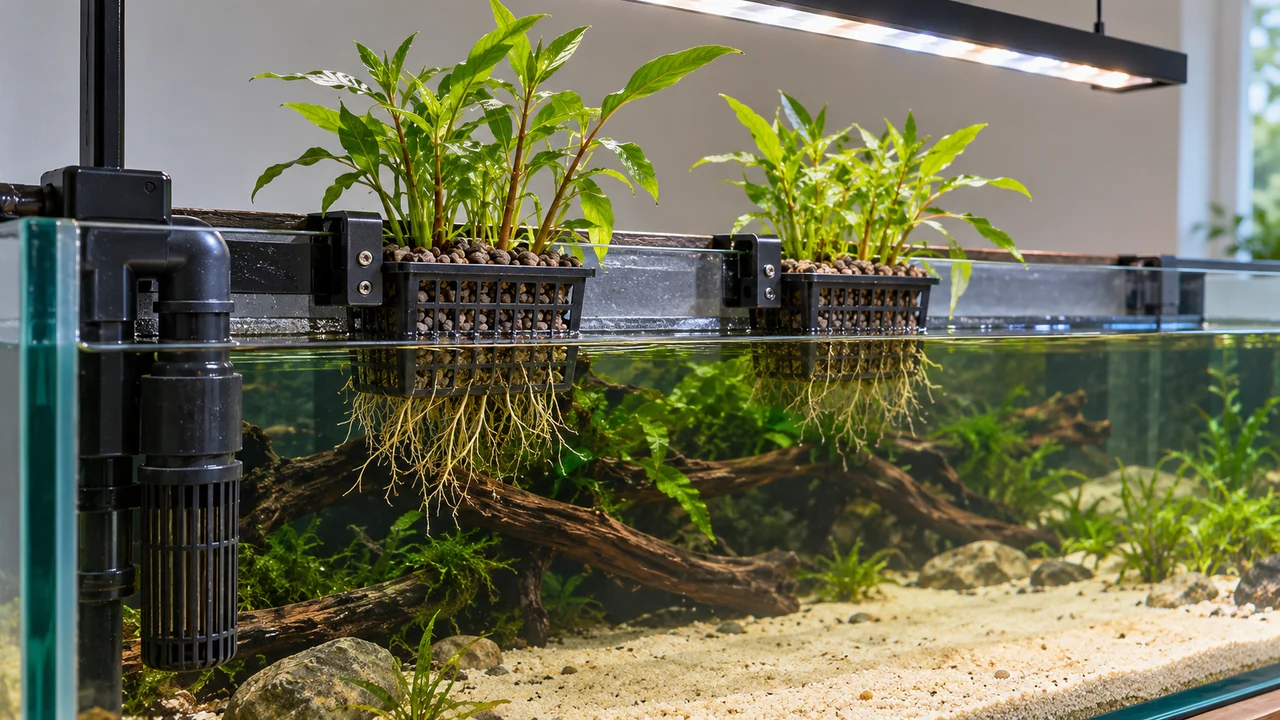
Use purpose-made supports or a correctly designed bracket system to hold small planting baskets at the rear. Check their wet weight and make them removable for inspection. A low aquarium-safe wood group can conceal part of the installation, but it should not be the only support for a basket that will grow heavier. Secure the wood before adding a modest layer of rinsed substrate around it.
Keep the filter intake in its own accessible space, physically separated from the root zone. Leave a clear front channel and room behind or beside the baskets for cleaning. Use an appropriate inert or planted-aquarium medium contained so it cannot wash out; do not pour ordinary fertilised houseplant compost into the tank. Test the assembly through a fill and partial drain before adding animals.
3. Choose plants that can actually cross the surface
Cultivated amphibious aquarium plants are a practical starting point. Bacopa caroliniana has documented submerged and emersed growth, while suitable Hygrophila corymbosa can grow above the surface. They differ in growth rate and adult bulk, so begin with small groups and leave trimming room. They are examples for a habitat-style design, not a statement that both belong in a single natural regional community.
Check the source, treatment and identity of each plant before introducing it to livestock. Remove unsuitable packaging and growing residues appropriately. Position stems and roots according to the plant's growth habit; do not assume every plant tolerates its crown or all its leaves permanently submerged. Conversely, a soft submerged-grown leaf may not survive immediate exposure to dry room air. Start with healthy material suited to the intended transition.
4. Establish humidity and light gradually
Use a limited temporary humidity cover around newly exposed plants if their condition requires it, while preserving appropriate ventilation and safe electrical clearance. Increase exposure progressively as new growth adapts, observing the leaves rather than following an invented fixed timetable. Tropica's account of an emersed layout illustrates that dry indoor air can remain a real limitation, even when roots have access to water.
Keep the lamp high enough to avoid heat damage and adjust planting height before foliage touches it. Do not compensate for wilting solely by flooding the crown or spraying electrical fittings. Choose sturdier suited plants if the room cannot maintain the humidity required by delicate specimens. Any cover must remain secure and workable for aquarium access; a loose decorative canopy is not reliable escape prevention.
5. Build the underwater margin with restraint
Place a thin pocket of prepared leaves at the wooden foot, leaving the open sand visible. Use a few distinct forms rather than filling every root gap: narrow leaves can follow the horizontal line while a larger broken leaf gives a sheltered edge. Check any pod openings and twig tips against the intended animals. Leave accessible places for deliberate feeding and for removal of loose waste.
Underwater plants can provide a second layer, but avoid crowding the front with species that will quickly hide the waterline transition. If root feeding is required, localise appropriate nutrition in the planted area and follow product instructions. Above-water plants may take up nutrients, yet their growth does not remove the need for an established filter, water testing, careful feeding and normal maintenance.
For a modest submerged leaf edge beneath the rootline, compare Dried Mango Leaves – Natural Aquarium Leaf Litter with Dried Longan Leaves – Natural Aquarium Leaf Litter. Keep the prepared pieces below the living plant crowns and away from the intake, where they can be inspected and lifted.
For occasional structural accents beside the established wood, the Aquascape Structure Box – 80–150L provides a selection of pod and cone forms to assess individually. Use only pieces that leave the baskets, intake and cleaning route accessible.
6. Choose inhabitants for the water, not the photograph
A stable planted interpretation can be suitable for a separately planned Neocaridina group, provided the actual minerals, temperature, cycling and maintenance fit their profile. Use the existing Neocaridina guide rather than forcing the aquarium into extreme soft acidic conditions because it contains leaves. Mature surfaces are useful grazing areas, but shrimp still require deliberate supplementary food and protection from unsuitable treatments or predatory companions.
Snails can offer another direction if the water and food support them; consult the Planorbella or another relevant guide rather than treating every snail as a cleaner. Assess climbing and escape behaviour before choosing an open planting arrangement. If adding jumping fish, provide a genuinely secure fitted cover or mesh system around every planting opening, or choose a different layout. A lower waterline alone is not a dependable barrier.
7. Commission filtration separately from the plants
Mature the biological filter and check ammonia and nitrite control before stocking. Run the return so water circulates around the wood and baskets without constantly battering roots or splashing onto dry electrical equipment. Protect small inhabitants at the intake. Check temperature and the filter's water-level limits during the reduced fill used for maintenance, not only at the normal display level.
Top up evaporation with suitable water and perform actual water changes as needed; topping up alone does not remove accumulated dissolved substances. Monitor the chosen water chemistry because repeated mineral additions in top-up water can change it. Keep replacement-water preparation consistent. Do not make a changing plant mass responsible for essential life support: a major trim, plant failure or root removal should not remove the only functional filtration.
If the chosen independent filter benefits from contained loose media, Coarse Mesh Filter Media Bags provide a removable containment option. Check fit and free flow within the actual filter while preserving the separate support and service routes for the planting baskets.
8. Manage the rootline before it becomes a curtain
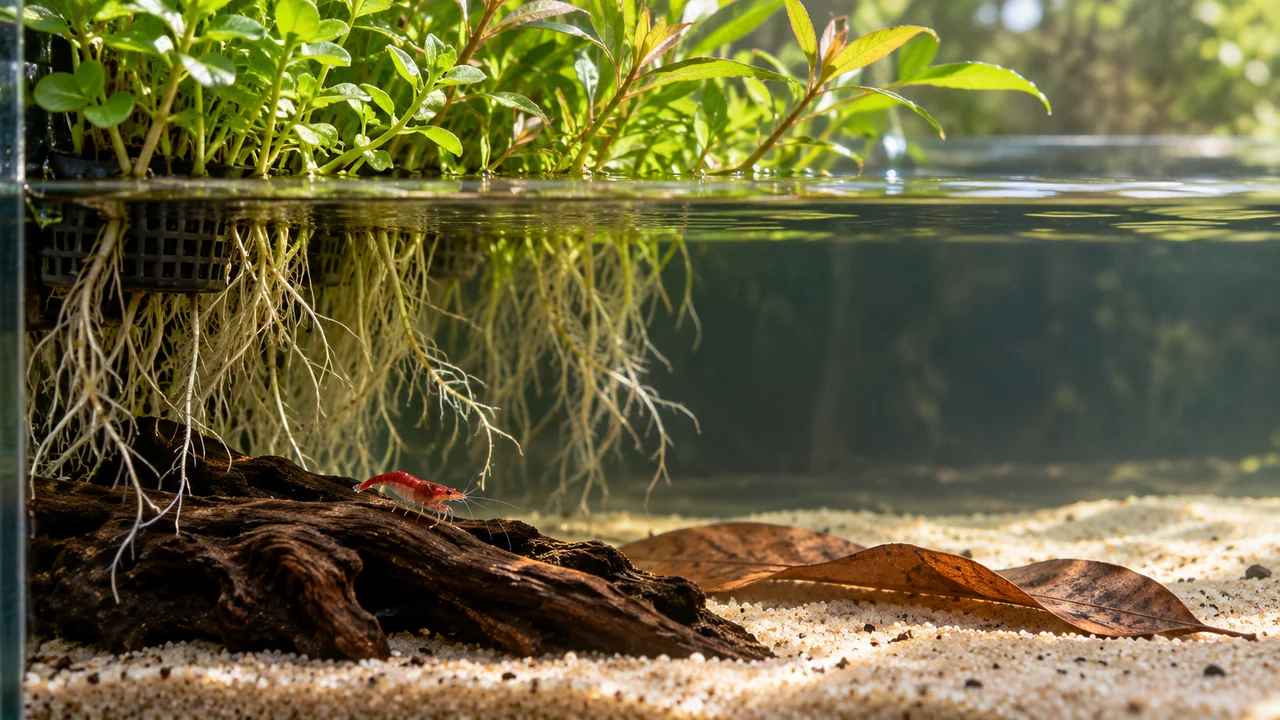
Inspect roots regularly and keep them away from pump guards, pipe joints and removable filter parts. Trim small sections when necessary, checking carefully for shrimp and other animals first. Remove dead roots or failing leaves rather than letting them accumulate behind the wood. Keep the baskets accessible so maintenance does not require dragging the whole underwater structure through the aquarium.
Above water, trim stems before they shade every submerged plant or press against the lamp. Recheck brackets as the wet mass increases. Maintain the open route between root groups and the clear foreground so the transition remains visible. A modest root system with healthy emerging foliage usually explains the idea better than an oversized wall of roots that cannot be cleaned or safely lifted.
Solve transition problems at their source
Wilting foliage with wet roots can indicate an unsuitable transition, humidity or heat problem; inspect those conditions before adding more fertiliser. Yellowing growth needs a considered check of plant suitability, light and nutrition rather than an automatic nutrient dose. A root mat full of trapped waste calls for thinning and improved access, not another layer of leaves to hide it. Restore the filter route if roots restrict circulation.
If the display looks disconnected, adjust one basket height or the low wood line instead of building a heavy landmass above the glass. If escape protection cannot be made secure for the selected animal, change the stocking choice or cover design. The finished rootline should connect water and air convincingly while remaining a practical aquarium: stable supports, healthy adapted foliage, usable underwater room and independent life support.
Further reading and sources
Natural-history references inform the habitat discussion. Dimensions, construction sequence and maintenance access are BBA design proposals, not measurements from a documented wild site or a claim that the pictured aquarium has been stocked and tested. Choose livestock using the linked species guide.
- Bacopa caroliniana — Tropica Aquarium Plants — Grower account confirming submerged and emersed growth; not a universal prescription for all marginal plants.
- Within the Flow, layout 127 — Tropica — Practical account of emersed plant growth and indoor humidity limitations; the BBA composition and text are original.
- Hygrophila corymbosa — Kew Plants of the World Online — Accepted botanical identity; aquarium practice is distinguished from taxonomy.